 |  |
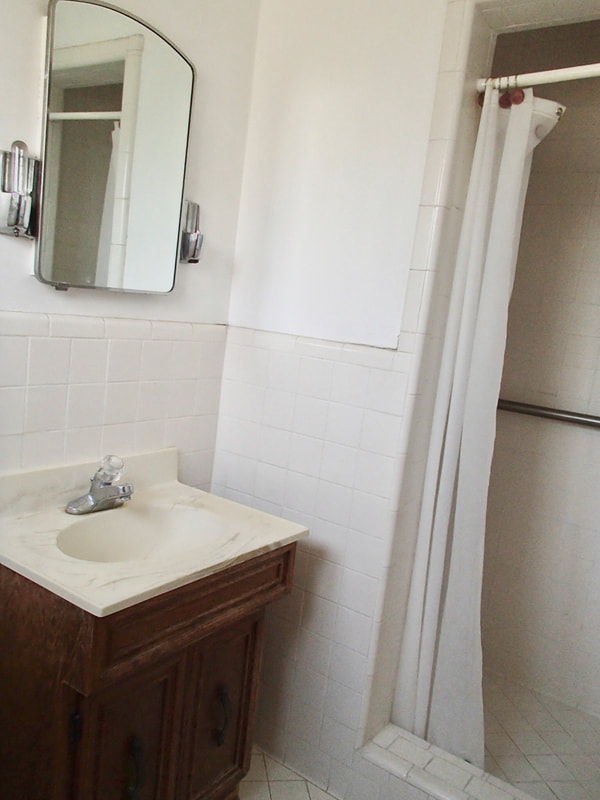
The master bath in this home was small, but pretty functional. However it felt dark, dank and dirty. The initial scope of work after our first walk-through was really simple, clean it, paint it, and replace the vanity. However, after living there for a few months and stripping the painted wallpaper (what a pain!) it was apparent it would definitely need more work than that. (Click 'Read More" to Continue)
My first idea was to open the shower doorway all the way to the ceiling, removing just a portion of the shower header. This would’ve added more light and better air circulation (the original design trapped all the moist air inside the shower, not allowing the exhaust fan to circulate and vent all that humidity, yuck!) Luckily, my dad had an even better idea, why don’t we just remove the entire header and open the whole thing? Now, why didn’t I think of that?!?! It was brilliant on multiple levels: demolishing the ceiling and upper tiles would get rid of the shower mold issue by allowing proper air flow, it would remove the maintenance issue of cleaning tile 2 feet above my head for years to come, and it would allow light into what was once a cavernous-feeling shower. Win, win, win! So out came the header. We also decided to remove a row of tiles to add a modern-feeling accent strip, and finished off the top row tiles with matching bullnose. We also removed the grab bars (which weren’t properly installed to begin with), replaced the damaged tiles with salvaged ones from the ceiling, replaced missing grout, replaced the hardware, added shelving, and sealed everything to make it watertight and provide easier cleaning.
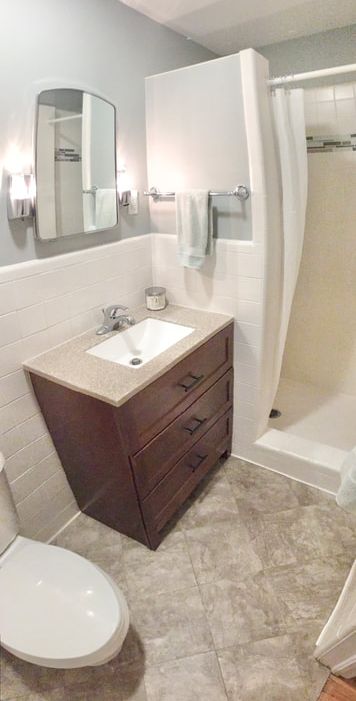
Outside the shower, I wanted to update the flooring. Upon removing the top, white layer of tile, we discovered a sublayer of pink tile (also in the shower). Since it was really installed well, we decided to leave the sublayer and just remove the white tiles (which also allowed me to keep the wall tiles in place without having to come up with a solution for the drop in floor height.) I also selected a new vanity so that we could coordinate the shower accent tiles, floor tiles, vanity and countertop before anything was installed.
I really wanted to keep two of the original bathroom elements, the ceiling light/heater/fan and the medicine cabinet with Edison bulbs. Once my dad refurbished them, they looked new again and retained the house’s mid-century charm. Since they were both chrome, we finished the project with new chrome towel bars and hardware. A bit of paint and a few other details, like a solid surface window sill and shelf organizer and we were finished.
The only thing I wish we could’ve done, is expand the bathroom into the furnace closet (making it almost twice as big) but that would’ve entailed an amount of renovation (and expanded budget) we just weren’t willing to take on at the time.
I had allocated about $1,000 at the initial walk through for updates, and we stayed pretty close to that WITHOUT accounting for labor cost. It took about 6-8 weeks to complete with just my dad working on it (along with a ton of other mini projects) since my husband was overseas and I was working full time. Overall, it was a great bang for the buck!
Original scope of work:
Final scope of work:
- Clean, clean, clean
- Replace vanity
- Replace hardware
- Remove shutters
- Remove wallpaper and paint
Final scope of work:
- Remove shower header structure (remove tiles on ceiling and upper walls of shower)
- Add shower accent tiles and upper border tiles
- Remove top layer of floor tile, etch/rough up underlaying tile for better adhesion and replace with new top layer of porcelain tile
- Remove crumbling grout and replace with new
- Add 3 soap/shampoo shelves
- Remove grab bars, replace tiles where hardware had been installed
- Replace shower hardware
- Replace vanity and sink hardware
- Refurbish original medicine cabinet
- Refurbish original ceiling light/heater/vent
- Replace old towel bar and add additional hand towel bar
- Replace wooden window sill with solid surface
- Remove window shutters
- Remove wallpaper
- Retexture walls
- Paint
 RSS Feed
