Hardwood floors and rugs can make for a slippery combination. But if you have as many rugs as I do, non-slip rug pads are a necessity - or at least they were.
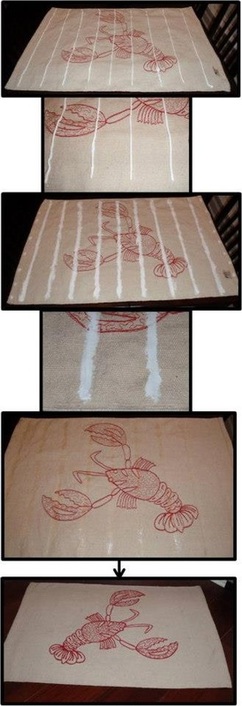
Instead of using one of those ugly rug pads, try caulking the back of your rugs. Here's how I did it:
1. I used DAP clear premium indoor/outdoor sealant.
2. Using a caulk gun I made rows on the back of the rug. Thinking that the elevated rows would show once they were dry, or worse, that I might feel them once the rug was in place, I smoothed them down flat.
3. I let it dry for about 24 hours and voila! This rug literally doesn't move an inch from where I placed it on our hardwoods. Note to self: I probably could have done fewer rows in strategic places around the edge and middle since this is our kitchen rug and it gets a lot of traffic.
4. What I recommend to people who try this: Start with your smallest or most replaceable rug, just in case you don't like the results. Also, start with fewer rows-you can always add more. I don't know how this would work on other types of floors or other rug fibers, so please test a small spot before you go all out. I do not want to ruin anyones vintage floors or expensive rugs!
Easy and inexpensive! And the best part is that you don't have to worry about a rug pad peeking its ugly little head from beneath!
Update:
1. I found that the more traffic a rug gets, the more the rug holds to the floor (for low traffic areas I had to use more rows of caulking).
2. I washed this rug on cold and hung it to dry - it turned out beautifully. It did not alter the rows of caulking at all!
 RSS Feed
